


This Easter will probably look a little different than most Easters you have had before. Due to the Coronavirus, we are all advised to stay in our homes. Visiting relatives and maybe even going to the grocery store are out of the question this Easter Sunday.
But do not worry! We have got some ideas for you about how to make beautiful Easter eggs at home using items you probably already have around the house!
For our first project, we will show you how to dye an egg using a 100% silk neck tie. Now, it doesn’t have to be a neck tie, it can be anything silk you don’t love anymore, but a neck tie was what we had available.

Materials needed:
eggs
silk neck tie
white tee shirt or any piece of cloth that you are ok with cutting up
The first step is to deconstruct the tie. Snip the seams and remove the lining so you are just left with the silk.

Next you cut a piece large enough to cover an egg. Wrap the egg with the side of the tie that would face out while wearing it. You want to try to wrap the fabric as tight as you can without breaking the egg. The more direct contact the silk has with the egg shell the clearer the imprint of the pattern. Where there are folds in the fabric you’ll get a swirly water color effect.

Once wrapped, tie with a piece of string or a twisty tie. Or, if you are like me and didn’t have either of these, then cut some strips from your white shirt that you will be using and tie your fabric with those.

After the eggs are wrapped in silk, you’re going to wrap them again with a light colored light weight piece of fabric. An old pillowcase, sheet, or thin dish cloth is perfect. We used a white t-shirt. Once again, tie with a piece of string or more strips of t-shirt.

Put all of your wrapped eggs in a pot and cover them with water. Add 1/4 cup vinegar and bring it to a boil. After about 20 minutes you can remove the eggs and set them in a colander or on a towel to dry and cool. Once they’re cool enough to handle you can remove the fabric.


Our next egg is going to be dyed by boiling onion peels to make a red dye!
Materials needed:
white eggs
onion peels
white colored pencil
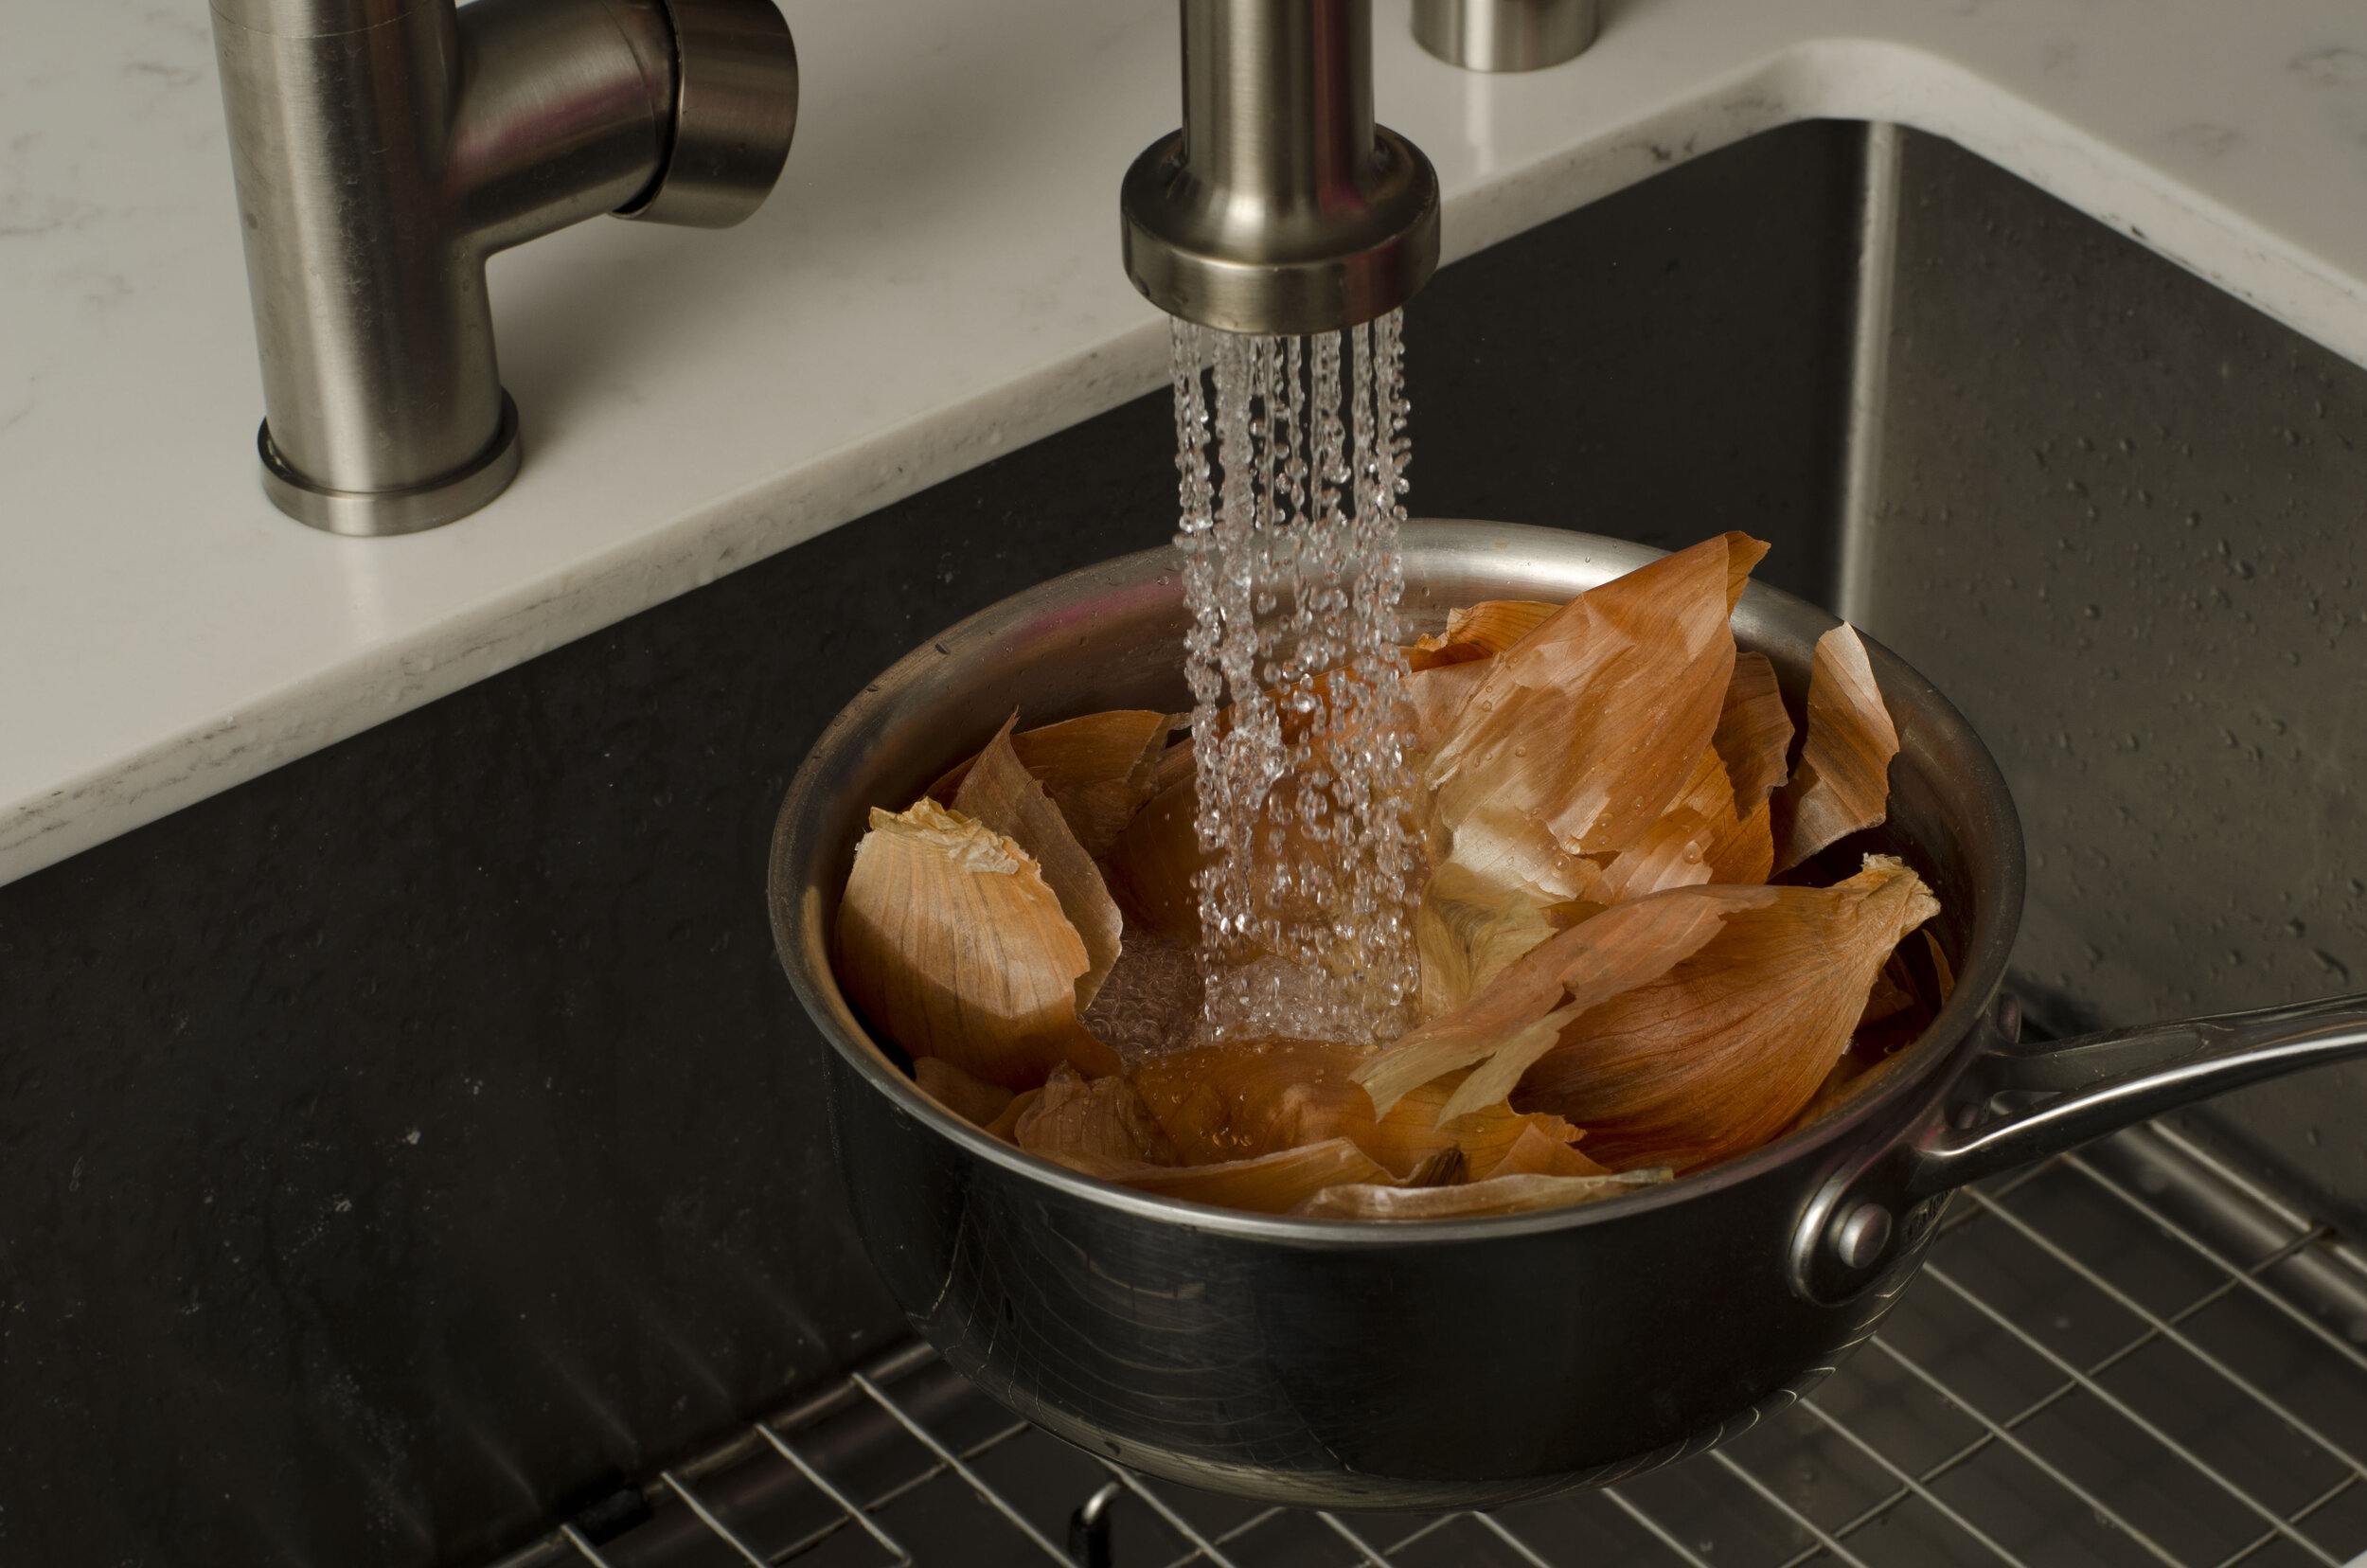
The first step is to peel the skins off of your white onions. Were you expecting red onions? Well, surprisingly, the brown peels of white onions make a very red dye!

Place your onion skins in a stainless steel pot and cover with water. Bring to a boil and continue to boil for about 10 minutes. Once the water looks nice and red turn off your burner and let your onion-skin water steep for about 30 minutes.

Once steeped, add in a 1/4 cup of vinegar and your eggs and bring back to a boil. Cook for about 8 minutes. Let the eggs cool in the pan and remove when cool to the touch.
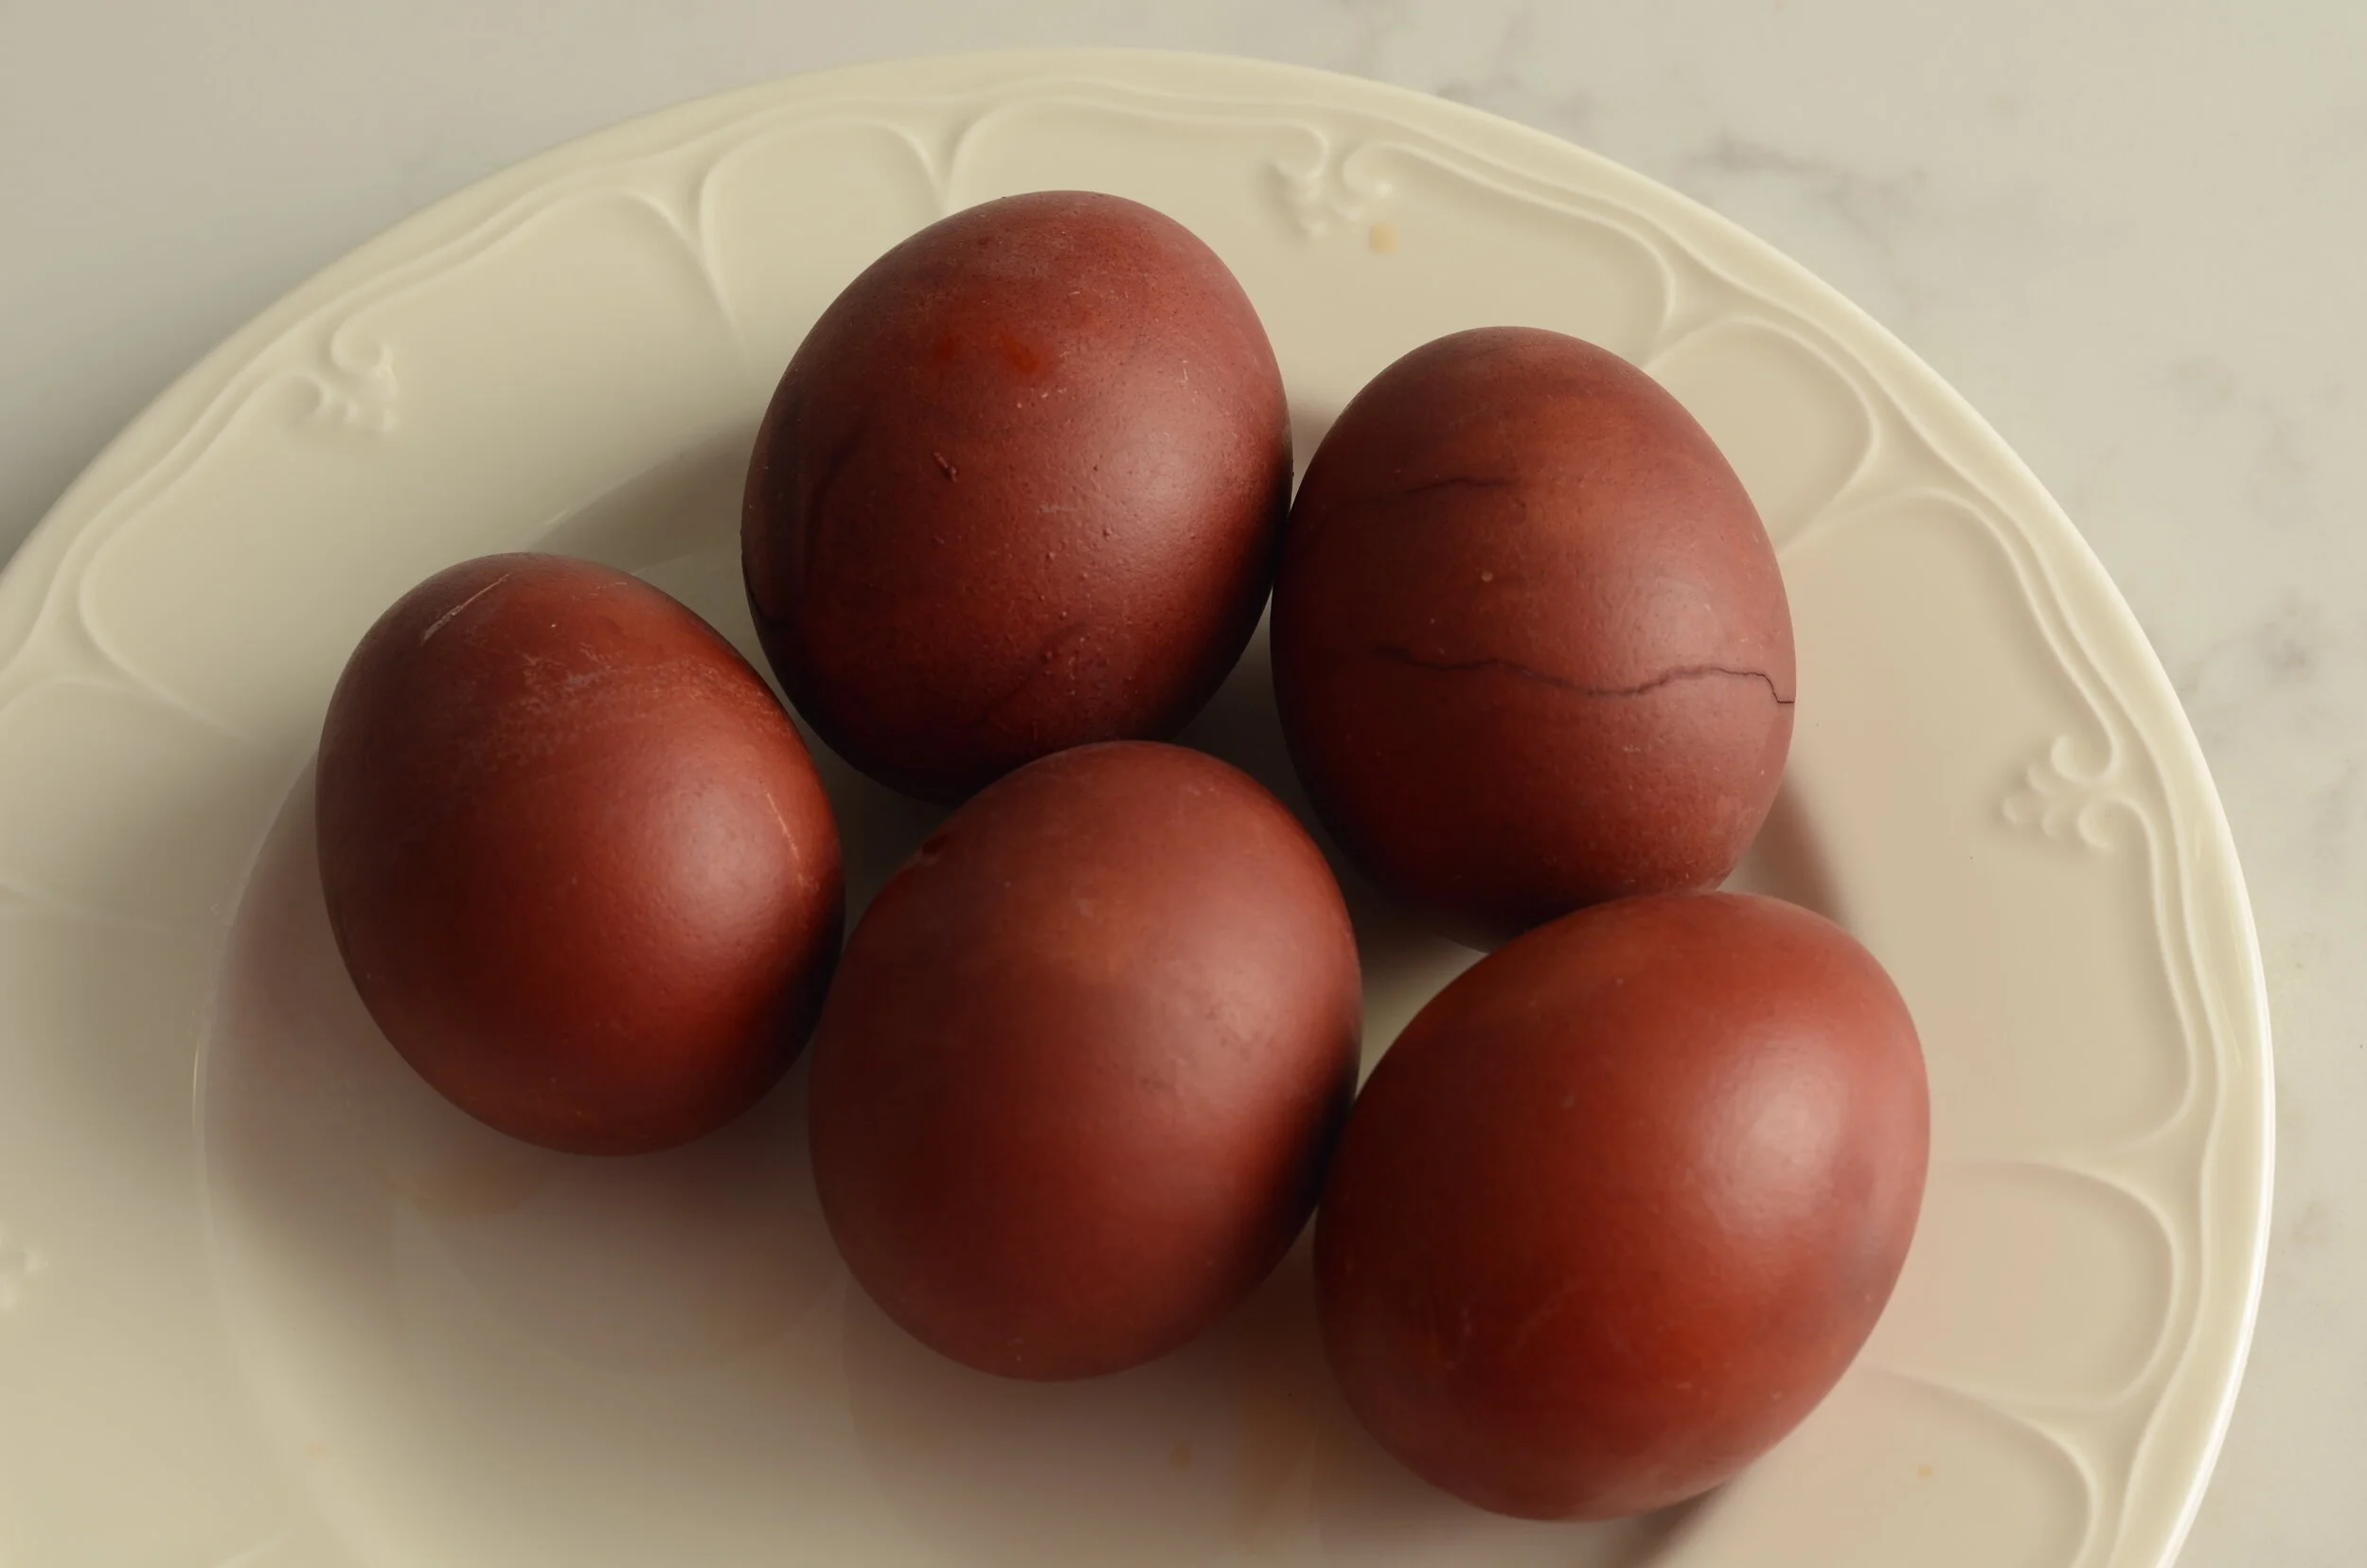
The traditional method of decorating these dyed eggs is to use a needle or thumb tack to scratch a design into the egg. We found that this didn’t quite work for us, so we used a white colored pencil that we had lying around the house.

I hope you have enjoyed these fun and easy methods of making Easter eggs at home and please have a safe and happy holiday!